As an Amazon Associate, this site earns commissions from qualifying purchases. For more details, click here.
Before you can experience the benefits of solar power, you have to install the mounting brackets first. There are many types of solar brackets for homes, RVs and boats, but the process has been simplified so anyone with basic DIY knowledge can do it.
Solar panel brackets are installed by fastening bolts or applying adhesive on the mounting rails onto a flat surface. Solar panels should be installed at an angle because it allows the cells to receive as much sunlight as possible.
Method 1: Install an Adjustable Tilt Solar Mount For RV
This bracket setup guide is designed specifically for installation on the rooftops of RVs, campers and other recreational vehicles. But you can install the bracket mounts on any surface as long as it is flat.
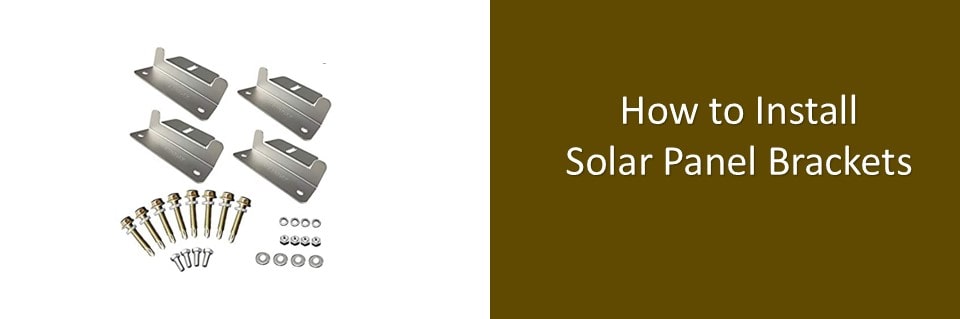
Your solar panel bracket manual includes a parts list, so make sure everything is included. The following are components for a WindyNation adjustable tilt solar mount. Parts for corner brackets and other types of mounts will be different depending on the manufacturer.
Parts List
- 4x Stainless steel flat washer
- 4x Stainless steel module bolt
- 4x Stainless steel flange nut
- 6x Steel wing nut
- 6x Steel knob nut
- 2x Aluminum surface mounting rails, 22″
- 2x Aluminum tilt angle bracket 11.25″
- 2x Aluminum panel mounting rails 22″-28″
Step 1: Pick a Spot on the RV Roof
Choose a spot that is flat and far from any obstructions. There has to be sufficient space for the mounting brackets and there must also be enough room in case you need to repair or clean the solar panel later on.
Just as the distance between solar panels and batteries must be correct, the same with solar panels and charge controllers. You can do this by choosing a spot that will reduce the amount of cables that will be used. How you install the mounting bracket can have an effect on the performance of your system.
Step 2: Fasten the Solar Panels to the Panel Mounting Rails
Use the wing nuts, flange nuts and module bolts to fasten the solar panel to the panel mounting rails. The rail size for the WindyNation mount is 22-28 inches, but for yours they may be different. Double check to ensure the panel is secure.
Step 3: Fasten the Panel to the Surface Mounting Rails
Use the wing nut and knob to connect the panel mounting rails to the surface mounting rails. When you are done there should be a pivot.
Step 4: Fasten the Surface Mounting Rails on the Roof
Now you have to bolt the surface mounting rail on the RV roof. The bolt needed to fasten the rails to the mount surface is not included. The reason is the surface thickness and material (fiberglass, wood, metal, composite etc.) determines what type of bolt to use. Refer to your RV manual for details on the roof composition.
Step 5: Set the Tilt Angle
Fasten the tilt angle bracket onto the mounting rail ends using the wing nuts and knob bolts. Once the bracket has been installed, you can adjust the tilt as necessary for the best possible results. When the angle is where you want it, secure the brackets.
What is the Best Angle For Solar Panels?
In the northern hemisphere the solar panel should be installed at an angle that faces true south. For the southern hemisphere the angle has to be true north.
The mounting angle has to be equivalent to the latitude of where you are setting up the panels. The latitude of Phoenix, Arizona is 33 degrees, so if you are there, your solar panel should face true south at a 33 degree angle.
It may not always be possible to set the solar panel to true south or north or at the angle you want. In that case just set the solar panels as close to these angles and degrees as possible.
Solar Bracket Installation Safety Tips
- First off, make certain your RV roof can support the weight of the entire solar panel system. Structural support will not be a problem for modern RVs, but if you have an older vehicle, do a thorough inspection.
- Always follow the instruction manual.
- Solar panels generate electrical energy when positioned near a light source. You can verify this by checking the output terminal which will register voltage. Put a cover on the solar panel during the installation to protect yourself from shock. Do not touch the output terminal.
- it is recommended you apply anti-galling lubrication on the stainless steel fasteners prior to installation.
- Install the brackets in sunny, clear weather only.
How to Store Adjustable Tilted Mounts For RV
As any RV owner will tell you, tilted mounts should be flat when your vehicle is moving. Only use adjustable tilted mounts when your RVis stationary. Driving with the adjustable brackets open is dangerous as strong wind gusts could blow it off.
Remove the wing nuts and knob bolts that secure the tilt angle bracket.
Lower the tilt angle brackets and the mounting rails. Keep lowering until the mounting rail holes and brackets are in alignment. The solar panel has to be flattened completely.
Secure the flattened solar panel with the wing nuts and knob bolts.
Method 2: Install Solar Panel RV Corner Bracket Mounts
The following is a general guide for solar panel corner bracket mount installation. These steps are mainly for Renogy but they should work for other manufacturers, but always check the instructions.
These instructions are for drill-free brackets, which are very popular because it is easy to set up and of course, you don’t have to drill anything on the roof. Properly installed, corner brackets elevate the solar panel to create an air gap that improves output. Corners mounts also deflect wind.
Parts List
- 4x Corner brackets
- 2x Side brackets
Suggested Tools
These tools are what you will likely use during the installation. You can opt for other tools if they can achieve the same results.
- Tape measure
- Spirit level
- Scotchbrite pads
- Masking tape
- Caulking gun
- Solar panel bracket adhesive
Step 1. Apply Adhesive on the Corner Brackets
Apply adhesive on one of the corner brackets. Put the adhesive on the top area where the solar panel will be installed., Align the corner bracket to one of the solar panel corners. Press firmly. Repeat this step for the other three corner brackets. Let the adhesive dry according to the product specifications.
Step 2. Apply Adhesive on the Side Brackets
Put adhesive on the upper side of the bracket. This is where you will position the solar panel.. Place the side bracket along the side of the solar panel. Align as needed then press firmly. Repeat this with the other side bracket. Allow the adhesive to dry as per the product specifications.
Step 3. Put Adhesives on the Brackets and Attach to Surface
Mark the spots where you want to position the solar panel. Make certain the solar panel is positioned so the solar cables are on the side you want.. Clean the brackets’ surface and the roof or whichever surface you will install the solar panel. This is necessary to ensure the adhesive sticks.
Apply adhesive under each bracket. Press the brackets on the surface. Apply pressure to make it stick. Allow the adhesive to dry for as long as the manufacturer recommends.
Safety Tips
- Some adhesives contain chemicals that may be harmful if not handled properly. Follow the instructions on the product label.
- Take all necessary precautions when using any of these tools.
- The installation should be done during a clear day. Rain will make it difficult for the adhesive to bond.
Method 3: Install Solar Panel Racks on a Roof
Installing a solar array on a rooftop is more involved than setting up solar panels on an RV because of the size. Nevertheless, the basic process is the same. As always check the instructions that came with your solar panel for more details.
Step 1: Choose a Spot on the Roof
Pick the one that receives the most sunlight. As explained earlier, it should be oriented true south if you are in the northern hemisphere and include the latitude of your location. You may need some help aligning the panels depending on the size. Get assistance if necessary to align the modules.
Step 2: Position the Mounting Brackets
Place the brackets above the rafters. Space each bracket about four feet apart or whatever the manufacture recommends. Use a stud finder if you cannot locate the rafters. You may also contact the solar manufacturer for the best possible placement.
Step 3: Attach the Mounts to the Roof
For RVs installation, adhesives, bolts and other fasteners are sufficient. With rooftop panels you may have to drill holes in the rafters. Follow the instructions that came with your solar panels. Drill carefully as that is where you will place the bolts that will hold the panel in position.
Step 4: Secure the Mounting Brackets
Use bolts or whatever fasteners came with your solar panel. Apply sealant around the area for extra security.
Step 5: Install the Solar Panel
Your solar panel comes with a mounting interface that connects easily with the mounts. Install it following the instructions. When the solar panel is in place, you can connect the panel to other components like an inverter, charge controller and battery bank.
What to Look For in Solar Panel Brackets
You can buy solar panel mounts easily, but choosing the right set is crucial. After all, these are going to hold your solar system in place.
- Compatibility. The brackets have to be compatible with your solar panel frame design. Most mounting brackets are universal, but others are not. so do not neglect this part. Check what surface material the brackets work best with and if it is a match with your RV roofing.
- Durable. These brackets will be exposed to all kinds of weather. Covering your solar panels will help, but even better would be to get UV resistant brackets made of ABS or other durable materials.
- Ease of installation. No long explanation needed here. The easier the brackets are to install the better.
- Drill free. Nobody wants to see new holes on their RV. Fortunately most solar panel brackets do not require drilling anymore.
Solar Panel Bracket Installation FAQ
What is the Best Type of Solar Panel Racking?
There is no single best solution. Solar panels should be slanted for maximum sun exposure, which is why most home rooftops will do fine. For RVs and other recreational vehicles, flat or tilted mounts are the best option.
Which is Better for RVs, Flat or Tilted Mounts?
Flat mounted solar panels can be used while your vehicle is mobile, but power output is not optimized. Tilted mounts are more efficient but have to be closed when you drive. More details can be found here.
My Home Has a Flat Roof. What Should I Do?
Use tilt legs so you can install the solar panels at the optimum angle. This is similar to the tilted mounts used on RVs so you can adjust it to receive the maximum amount of sunlight.
I Don’t Want to Drill Holes in My Roof. What Can I Do?
If you don’t want to drill holes in your rooftop, or your homeowners’ association forbids it, use ballasted roof mount. These are set on a base and use concrete and other structures to support a solar array. This only works with a flat roof.
Which is Better, Ground or Roof Mounts?
Roof mounts receive more sunlight because they are high up. However it is harder to clean solar panels on a roof. Ground mounts are easier to set up and maintain, but they are not as efficient. If you have available land, a ground mount is a good option.
Should I Buy Trackers?
Trackers are designed to optimize solar panel performance, adjusting the mount to face the sun. But the benefits are not enough to offset the cost. It is more practical to install additional solar panels than install a tracker.
Concluson
Installing solar panel brackets is no longer just for professional installers, as anyone can do it. As you can see, these days you don’t even have to drill. A lot of the parts offer full compatibility so that will not be a problem. Whether it is for your home or RV, installing brackets for a solar power system is straightforward.

I am an advocate of solar power. Through portablesolarexpert.com I want to share with all of you what I have learned and cotinue to learn about renewable energy.