As an Amazon Associate, this site earns commissions from qualifying purchases. For more details, click here.
There are many types of solar panels and batteries you can install in an RV, and the same can be said for how you mount the panels. The most popular options are flat mounting and tilted mounting. Each has its own pros and cons, so which one should you use?
Flat mounting solar panels are easier to install and doesn’t need many adjustments, but it’s prone to dirt buildup and generates less power. Tilted mount solar panels provide more power and easier to clean. But you cannot use them while driving as it’s too risky.
If you’re going to spend a lot of time traveling, flat mounted solar panels is ideal. If you’re going to stay put for prolonged periods of time in one area, tilted mounting solar panels provides better results.
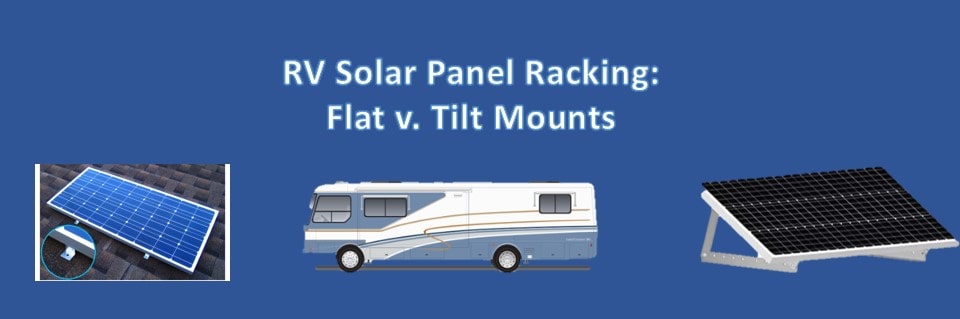
Flat Mounted Solar Panels For RVs
Mounting solar panels flat on the roof is the simplest method. You can do this with any rigid or flexible solar panels , mono or polycrystalline. Flexible solar panels are particularly easy to install as they have adhesives that stick to the roof. However there are some drawbacks with flat mounts too.
Advantages
- Easier to set up than tilted mounting
- Can be used even while you drive
- You don’t have to adjust the angles
- No tinkering required
- Doesn’t need a lot of racking hardware
Disadvantages
- Uses a lot of space
- Lower panel efficiency compared to tilt mounts
- Can collect dust and dirt quickly
- Your RV must be park near direct sunlight
Tilted Mounting Solar Panels For RV
Tilted mounts position solar panels at an angle, allowing it to absorb more energy from the sun. It’s more efficient than flat mounting, but you can’t use the solar panels when driving because they might break or fly off. So you have to get on the roof to lower the mounts before you drive, and go up again to raise it when you park. More power yes, but it can be a hassle.
Advantages
- Produces up to 30% more solar power than flat mounting
- Easy to clean
- Doesn’t suffer from frequent power fluctuation
Disadvantages
- Cannot be used when driving
- Cannot be used in windy conditions
- Needs to be set manually set down every drive
Which RV Mounting Rack Should I Use?
There is no one size fits all answer because it depends on how you drive and spend time in your RV. If you have been RVing for a while you’ll have an idea which setup is better. Here are some suggestions.
if you spend most of the day driving then flat mounting is recommended. It’s your best option especially if you travel on dusty roads or through windy, situations. You can focus on driving without worrying about the panels breaking or flying off. Solar production will be lower, but that’s what batteries and solar generators are for.
if you spend more time in RV campgrounds then you’re better off with tilted mounts. Take advantage of your spot to collect solar energy, and you only have to adjust the mount when you depart. This is really the deciding factor. if your RV is always mobile then it’s flat mounting, otherwise use tilted solar panel mounts to for higher efficiency.
Is Your RV Roof Ready for Solar Panel Mounting?
Now that you know the difference between flat and tilted mounting, we can proceed with installation options. But first you should make sure that your RV roof is suitable for it.
Roof durability: what is the roof made of? Rubber, fiberglass, metal? The material determines what installation method is ideal (more on this shortly). More important, what is the roof strength? Can it handle large solar panels? Solar panels 250W and above will need a frame for the mount.
Maintenance: how easy is it to reach the roof and clean it? Flat mounted solar panels will be prone to dirt. Tilted munts on the other hand, will require to get up on the roof frequently.
Shape: is the roof curved or flat? If it’s curved, consider flexible solar panels. If you want to install flat mounts, a rack is necessary.
How to Install RV Solar Panel Mounts
There are three methods, all of which should work with flat or tilted mounts. The following is an overview of the process. Your flat or tilted mount comes with the hardware required to install it on the roof. However the procedure will be similar to any of the following.
Mount Tape: as you may know already, this is often used with flexible solar panels. But extra strong mounting tape can also be used for flat and titled mounting.
Bolt on: this is the most common installation used for flat mounted solar panels. It’s the best option if your RV has a roof rack or you plan to install one.
Lap Sealant and Z Brackets / Screw Mounts: this method is for RVs with rubber roofs.
Bolt-on Method
if your RV has a roof rack, just bolt the panels on it. You have two options: bolt the frame on the rack or mount the solar panels with brackets.
Bolt on is the easiest method and works fine with most RVs. Your mount should have all the bolts needed and you can always find the parts in any hardware store.
Mounting Tape Method 1
There are many kinds of tapes you can use, such as VHB by 3M, double sided foam tape and others. We recommend VHB because it’s heavy duty and works very well with solar mounting. We are using VHB tape in this example.
- Wipe the mounts clean with water or alcohol. Do the same with the solar panels (so not apply alcohol on the glass). Clean the RV roof with soapy water if you haven’t done so already.
- Connect the mount to the solar panel with adhesive tape.
- Stick the tape to the mounts’ bottom. Put tape across the bottom surface.
- Set the mount (with the solar panel attached) on the roof. Take off the peel off the VHB tape.
- Press the mounts on the roof firmly.
- Put lap sealant along the mounts.
- Wit 72 hours for the tape to stick fully.
Mounting Tape Method 2
Another way to use VHB tape is to attach it directly on the roof and the solar panel. Lift one end of the panel, tape a long piece of wood or metal on it. Put tape on the wood / metal and press the end of the solar panel on it.
The solar panel is now tilted (the degree of tilting depends on how high the wood / metal is). Attach the lower end of the panel on the roof with VHB tape.
You can use a very similar method to mount flexible solar panels on an RV. Use zip ties to join all the panels you want to install. Place them on the roof and attach VHB tape on the corners. It’s a quick and easy technique that does away with mounting. Thin film panels benefit from air flow, especially if it’s hot. Flush mounting these panels make them vulnerable to overheating. Just place some wood under the panels to raise it off the roof and use VHB to secure them.
Z Brackets Method
For RVs with rubber roof, Z brackets and lap sealant is the preferred choice. This will only work if there’s wood under the rubber material, but most RVs do. Make sure that the wood is thick enough to hold the solar panel. Most RV plywood only need 4-8 Z brackets, but add more if the plywood is too thin. You’ll need to drill additional holes for the mounts and you’ll need sealant to prevent leaks.
- Wash the roof with soapy water and let it dry. This is necessary for the sealant to work.
- Set the brackets on the corners of the solar panel.
- Raise the panels and place where you want them to.
- Apply sealant between the bracket and the roof. After screwing the Z brackets, add another coating of sealant.
Which Mounting Installation Should I Use?
Each RV owner has their own preference, and you can probably use any of the three methods above for any roof if you really want to. But to keep things simple here are a few general guidelines to consider.
- For curved roofs, use the mounting tape method. Most flexible solar panels have sticky adhesives already built in. If you want you can install a rack and set the solar panel on it.
- Use lap sealant and Z brackets if your RV has a rubberized roof.
- For fiberglass or metal roofs, use adhesive mount tape.
- Use the bolt-on method if your RV has a roof rack or you want to install one.
Conclusion
A lot of thought goes into buying solar panels, and we should do the same with solar mounts. Your solar panel is only as good as the racking mount so make sure that it’s properly set up. Whether you opt for flat or tilted mounting, what’s important is ensuring that it’s the appropriate one for your RV.

I am an advocate of solar power. Through portablesolarexpert.com I want to share with all of you what I have learned and cotinue to learn about renewable energy.