As an Amazon Associate, this site earns commissions from qualifying purchases. For more details, click here.
As more RV enthusiasts embrace the benefits of solar power, ensuring the proper functioning of RV solar panel connections becomes increasingly vital. These connections serve as the lifeline of your off-grid adventures, providing clean energy to power your appliances and electronics.
Key Takeaways:
- Always disconnect power sources and wear appropriate safety gear before inspecting RV solar panel connections.
- Visually examine wires, connectors, mounting hardware, and perform electrical testing to ensure proper functionality.
- Clean connections, check charge controllers, and perform load tests periodically to maintain optimal performance and longevity of the solar power system
Safety Precautions
Before embarking on any maintenance task, prioritizing safety is paramount to prevent accidents and ensure personal well-being. Here’s a comprehensive list of safety precautions to adhere to:
- Disconnect all power sources to the solar panel system to mitigate the risk of electric shocks.
- Equip yourself with appropriate safety gear, including gloves, safety glasses, and non-conductive footwear, to protect against potential hazards.
- Exercise caution and employ proper ladder safety techniques when accessing the roof of your RV to inspect the solar panels.
- Work on a stable surface, avoiding slippery or uneven surfaces that may pose a risk of falls.
Visual Inspection
A thorough visual inspection serves as the first line of defense in identifying potential issues with your RV solar panel connections. Take your time to meticulously examine the following components:
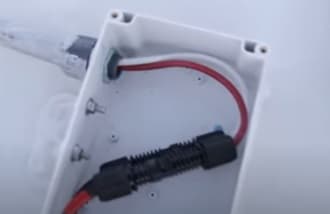
Wires: Inspect the wiring connections for any visible signs of wear, corrosion, or damage, such as fraying, cuts, or exposed conductors. Ensure that all wires are securely fastened and adequately insulated to prevent electrical hazards.
Connectors: Check the connectors between the solar panels, wiring, and charge controller for tightness and corrosion. Clean any debris or oxidation from the connectors using a contact cleaner or a mild solvent to ensure a secure and reliable connection.
Mounting Hardware: Examine the mounting hardware of the solar panels to verify that they are securely fastened to the roof of the RV. Look for any loose bolts, cracks, or signs of deterioration that may compromise the stability and integrity of the panels.
Electrical Testing
Once the visual inspection is complete, proceed to conduct electrical testing to assess the performance and functionality of your RV solar panel system. Utilize a multimeter or a clamp meter to measure voltage, current, and continuity at various points in the system:
Test Voltage: Measure the voltage output of each solar panel individually to ensure they are generating power within the expected range. Compare the readings to the manufacturer’s specifications to identify any discrepancies.
Check Current: Measure the current output of the solar panels to verify that they are delivering the expected amount of power to the charge controller. Ensure that the current readings are consistent and proportional to the sunlight intensity.
Test Continuity: Check for continuity between the solar panels, wiring, and charge controller to ensure there are no breaks or interruptions in the electrical circuit. Test each connection point to confirm the presence of a continuous path for electricity flow.
Check the Charge Controller
The charge controller serves as the brain of your RV solar panel system, regulating the flow of electricity from the solar panels to the battery bank. Conduct a thorough inspection of the charge controller to ensure it is functioning correctly:
Connection: Verify that the charge controller is properly connected to the solar panels and battery bank, with all terminals securely tightened and free from corrosion or oxidation.
Settings: Check the settings and configuration of the charge controller to ensure they are optimized for your RV’s power requirements and battery type. Adjust the charging parameters as necessary to maximize battery life and performance.
Status: Monitor the status indicators and display screen of the charge controller for any warning lights, error messages, or abnormal behavior that may indicate a malfunction or issue. Refer to the manufacturer’s documentation for troubleshooting guidance if necessary.
Inspect Wiring
Trace the wiring connections from the solar panels to the charge controller and battery bank, inspecting each connection point for signs of wear, damage, or improper installation:
Loose Wires: Tighten any loose wire connections and secure them with appropriate fasteners to prevent them from coming loose during travel or exposure to vibrations.
Overheating: Look for signs of overheating, such as melted insulation or discoloration of the wires, which may indicate excessive current flow or a poor connection. Address any overheating issues promptly to prevent damage to the wiring and surrounding components.
Wire Gauge: Ensure that the wire gauge used for the connections is appropriate for the current rating of the solar panels and charge controller to minimize voltage drop and electrical resistance. Replace any undersized or inadequate wiring with a suitable gauge to maintain optimal performance and safety.
Routing: Check the routing of the wiring to ensure it is protected from physical damage and properly supported to prevent chafing or abrasion. Use cable clamps, zip ties, or conduit to secure the wiring along its path and minimize the risk of damage from environmental factors or rough terrain.
Clean Connections
Dirt, dust, and debris can accumulate on solar panel connections over time, impeding conductivity and affecting performance. Clean all connections thoroughly using a soft brush, lint-free cloth, and a mild detergent solution:
Connectors: Clean the connectors between the solar panels, wiring, and charge controller to remove any dirt, grease, or oxidation that may hinder conductivity and cause resistance. Use a contact cleaner or a mild solvent to dissolve stubborn residue and ensure a clean, reliable connection.
Terminals: Clean the terminals of the charge controller and battery bank using a wire brush or abrasive pad to remove any corrosion or oxidation buildup. Apply a thin layer of dielectric grease or anti-corrosion compound to the terminals to protect against future corrosion and ensure optimal conductivity.
Sealants: Check for any cracks or gaps in the sealants around the connectors and wiring penetrations on the roof of the RV. Reapply sealant as needed to maintain a watertight seal and prevent water intrusion, corrosion, and damage to the electrical components.
Perform Load Test
Once you have completed the inspection and maintenance of your RV solar panel connections, it’s essential to perform a load test to validate the system’s performance under real-world conditions:
Load: Connect a load, such as an appliance or light, to the battery bank to simulate typical usage and draw power from the solar panels. Monitor the system’s response to the load and observe any changes in voltage, current, or performance.
Voltage Drop: Measure the voltage drop across the system under load to ensure it remains within acceptable limits and does not indicate any issues with wiring, connections, or component performance. Address any voltage drop issues promptly to maintain optimal efficiency and reliability.
Stability: Assess the stability of the system’s output under load, observing any fluctuations or irregularities that may indicate a problem with the solar panels, charge controller, or battery bank. Investigate and troubleshoot any stability issues to ensure consistent and reliable performance in varying environmental conditions.
Performance: Evaluate the overall performance and efficiency of the RV solar panel system, comparing the actual output to the expected output based on the solar panel specifications and environmental conditions. Make any necessary adjustments or optimizations to maximize energy harvest and ensure long-term reliability and sustainability.
Troubleshooting RV Solar Panel Wiring
RV solar panel systems provide a reliable and sustainable source of power for off-grid adventures. And you don’t have to worry about solar tax credits. LNK However, like any electrical system, they may encounter issues requiring troubleshooting. In this guide, we’ll explore common problems with RV solar panel connections and provide step-by-step instructions on how to troubleshoot and resolve them effectively.
Inspect Visual Cues
Start by visually inspecting the RV solar panel connections for any obvious signs of damage, wear, or loose components. Look for:
- Frayed or damaged wires.
- Loose or corroded connectors.
- Physical damage to mounting hardware.
- Discoloration or melting of insulation indicating overheating.
Check Electrical Output
Use a multimeter to measure the voltage and current output of the solar panels to verify they are generating power as expected. Ensure:
- Voltage readings match panel specifications.
- Current output is consistent and proportional to sunlight intensity.
- No significant voltage drop or irregularities indicate wiring issues.
Test Charge Controller
The charge controller regulates power flow from solar panels to batteries. Troubleshoot by:
- Verifying proper connection to solar panels and batteries.
- Checking settings for correct configuration.
- Monitoring status indicators for errors or malfunctions.
Trace Wiring
Trace wiring from solar panels to charge controller and batteries, inspecting for:
- Loose or disconnected wires.
- Overheating or melted insulation.
- Corrosion or oxidation on connectors.
- Incorrect wire gauge causing voltage drop.
Clean and Secure Connections
Clean dirty or corroded connections using a wire brush and contact cleaner. Ensure:
- Tight connection of wires and connectors.
- Proper insulation and protection from elements.
- Secure mounting of solar panels and hardware.
Perform Load Test
Simulate real-world usage by connecting a load (e.g., appliance) to the battery bank. Monitor:
- Voltage drop under load.
- Stability and consistency of power output.
- Overall performance and efficiency of the system.
Consult Manufacturer Guidelines
Refer to the manufacturer’s documentation for troubleshooting guidance specific to your RV solar panel system. Follow recommended procedures for addressing common issues and resolving technical problems.
If troubleshooting steps do not resolve the problem or if you’re unsure about electrical work, consult a qualified technician or RV solar specialist for assistance. They can diagnose and repair complex issues safely and effectively.
Conclusion
Regular inspection and maintenance of your RV solar panel connections are essential to ensure the reliable operation and longevity of your solar power system. By following the comprehensive guide outlined above and conducting routine checks, you can identify and address any issues promptly, keeping your RV powered by clean, renewable energy wherever your adventures take you.
Remember that proper maintenance and care are key to maximizing the efficiency, performance, and lifespan of your RV solar panel system, allowing you to enjoy the freedom and convenience of off-grid living to the fullest.

I am an advocate of solar power. Through portablesolarexpert.com I want to share with all of you what I have learned and cotinue to learn about renewable energy.