As an Amazon Associate, this site earns commissions from qualifying purchases. For more details, click here.
The wires connecting the charge controller to the battery have to be the right size to get the best results. The cables transmit current from the different parts of the PV system, so you need to use the optimum wire gauges.
The cable connecting the charge controller and battery can be the same size as the one on the solar array. The further the controller is from the battery, the thicker the cable needs to be.
Calculate Charge Controller to Battery Wire Size
Solar cable wire sizes are based on standard AWG, so you should have no problem finding one. The following table lists the most widely used solar controllers and the corresponding wire sizes.
The figures on this table are for high quality copper cable. The wire size recommended for your charge controller may be different. Check your owner’s manual or contact the manufacturer.
| Charge Controller Capacity | Wire Size |
|---|---|
| 10 amps | 16 AWG |
| 20 amps | 12 AWG |
| 30 amps | 12-10 AWG |
| 40 amps | 10-8 AWG |
| 60 amps | 8 AWG |
| 80 amps | 6 AWG |
| 100 amps | 6 AWG |
The rule for any type of solar cable is, use the thickest and shortest wire size available. The sizes given above are the optimum, though you can always go with a bigger cable. So if you have a 30A charge controller, you can use the Renogy 8 Ft 10 AWG cable for your setup.
Some more reminders:
- We emphasize bigger, thicker cable wire, not longer. The longer the wires, the more current is lost. So keep the wire between the controller and battery as short as possible. This also applies to the solar panel and battery cable.
- Always follow the cable size recommended in the controller manual. If the manufacturer says use a specific wire size, go with only that.
- Use only high quality cables. Look for those designed specifically for batteries and charge controllers. The more flexible the cable the better.
- Make sure the controller size is suitable for the battery.
By using the table above or the information in your user manual, it is easy to find the right controller cable. Now you just need to arrange the system so the cable run is as short as possible.
Ready to size your solar system the smart way?
Get the DIY Solar Planner — includes a powerful sizing calculator and a step-by-step guide to plan your solar panel system with confidence. You also get wiring diagrams for solar panels, inverters, batteries and much, much more.

More about Charge Controller and Battery Cable Sizes
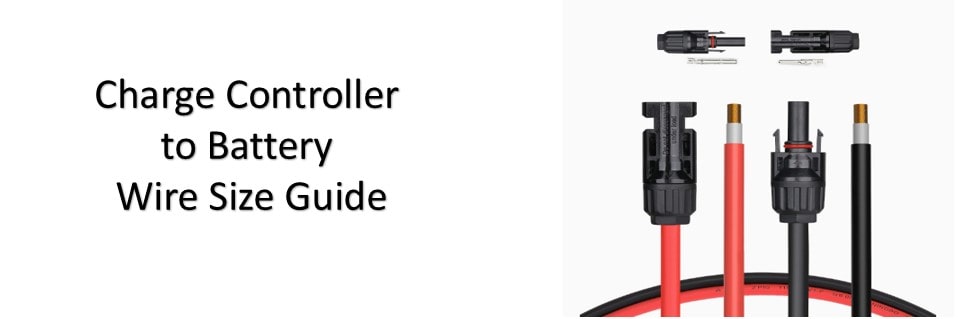
No matter what battery cable size you choose, there must always be two, one positive and the other negative. The stripped end goes into the controller and the connectors to the battery.
When choosing a wire size, make sure the gauge is big enough to transmit the amps that the system will supply. A powerful PV system will underperform if the cable is too small. This is applicable event to a 10A charge controller.
There are some solar controllers that are compatible with certain wire gauges. Check the controller manual for information on the terminal specs. Use the largest wire gauge that the terminal can work with.
Solar cables can never be too thick, but they can be too long. The thicker the wire, the more current can pass through. That is exactly what you want in a solar PV system, generate as much power as possible.
Now you are probably asking, what happens if the wire gauge is too big? Nothing will happen, at least nothing that will harm your solar system.
With charge controller and battery cables, the goal is to minimize energy loss and maximize current transmission. The best way to do this is with thick cables. The distance between the cables should be reduced as well.
The only drawback with thick cables is they are expensive and heavy. However the cost is worth it because you will get more power from your PV system.
Of course there are times when a large, thick cable is unnecessary. If you are using a portable solar charger to recharge a phone, the bundled cable will do fine. But for large PV systems, get the thickest wire the controller and batteries will support.
Do You Need a Fuse between a Charge Controller and Battery?
A fuse is not required and neither is a circuit breaker. But it doesn’t hurt the system and for safety reasons you should install one. Although solar panels are safe, accidents can happen and it is better to have a fuse to minimize the risk.
The charge controller and fuse amps have to match. Place the fuse about 8 inches from the battery and it should work fine. Once installed, the fuse will safeguard the connection.
How to Connect a Charge Controller to a Battery
First you should prepare all the necessary tools and materials. A negative and positive cable are required to link the battery to the controller.
This is a general overview only. Follow the instructions provided by your charge controller manual.
Tools
- Screwdriver
- Wire crimper
- Heat gun
Materials
- Battery cables
- Battery
- Charge controller
- Fuse in a holder
Note: one end of the battery cable must be stripped and the other has terminal connectors.
- Put the fuse in the holder if it is not there already.
- Position the fuse holder between the controller and battery. Crimp the wires and connect the fuse to the battery positive wire.
- Use the heat gun to shrink wrap the connector.
- Connect the positive battery cable to the positive battery terminal on the charge controller. Repeat this with the negative battery cable. You connect the cable via the stripped end. Screw tight.
- Connect the positive battery cable to the positive battery terminal. Repeat with the negative cable.
- Turn on the controller. It should light up. If it does not, give the cables a tug to ensure the connection is secure.
Once you are done, you can connect the controller to the solar panel. If you are going to run AC appliances, you can install an inverter.
Frequently Asked Questions
How far can the charge controller be from the battery?
You can place a charge controller as far from the battery as the cable will go. But the increased distance will affect performance negatively. A long, narrow cable will generate a lot of resistance. By the time the current reaches the battery a lot of energy will have been lost.
Can the solar panel and battery cable be of different sizes and length?
Ideally the cables should be the same size or close to it. Your owner’s manual provides details on what cable to use. If you compare the wire size suggestions for the solar panels and charge controller, it will be close to each other.
Can you hook a solar panel directly to battery?
Yes, but a charge controller should be installed. The controller provides safeguards to keep the battery from being overcharged by the solar panels. Even if the panels and batteries are the right match, there is always the possibility of to much current flowing in. A controller will prevent this from happening.
What happens if the wire gauge is too small?
By gauge we refer to the diameter, not the length. The more current / amps that flows, the larger the wire needs to be. Small wires produce more resistance and impedes the flow of current. At the very least your system will underperform. The worst case scenario is the wire will melt and cause severe damage.
Does electricity move faster in thin or thick wires?
Electricity does not necessarily move faster with thicker wires. However, the larger gauge allows more current to go through. An analogy for this is a road. The wider the road, the more vehicles can pass. The same applies to current flowing through battery cables.
Do expensive cables make a difference?
Only if the cables have a thicker gauge. It just so happens that thicker cables are best suited for charge controllers and batteries and they cost more.
Can a solar charge controller work without a battery?
No. The purpose of a charge controller is to regulate the current that goes into a battery. Without a battery there is no need for a controller. Grid tied solar systems do not require batteries so they don’t need solar controllers either.
Conclusion
Charge controller cables are critical to any PV system set up. The wire size can literally spell the difference between a reliable solar power system and poor performance. Always use the right wire sizes and get the highest quality option possible.

I am an advocate of solar power. Through portablesolarexpert.com I want to share with all of you what I have learned and cotinue to learn about renewable energy.